Table of Content
There are primarily five methods you can use to display a digital menu board on your TV screen, categorized as either manual or dynamic/automated, where content management is concerned. We’re going to look at USB playback, screen mirroring using an HDMI connection, and device casting, all of which fall under the first category. They have a low barrier to entry cost-wise and are quite popular with small cafes or single locations with a stable menu that doesn’t change frequently.
That said, the game changes entirely for multi-location operators or QSR/restaurant chains that need brand uniformity across locations, remote management, and scheduling and dayparting features all under one unified system using digital signage software. And if any of this resonates with your current digital menu board needs, sit tight, we are going to break down how you can display a dynamic, attention-grabbing, and compliant menu with the help of Look CMS.
By the end, you’ll understand all the different methods we’ve mentioned and how to set them up, technical requirements, installation and compliance guidelines, and how to implement your menu board with best practices to help you succeed.
Understanding Your Display Options & How to Set Them Up
USB stick method: Simple and budget-friendly
Besides the TV itself, you only need a thumb drive, which typically costs around $10. You save images/videos onto the drive, plug it into your TV’s USB port, and the TV’s built-in media player displays them as a slideshow.
Limitations:
Manual updates – Requires someone to swap USB drives with updated price changes or seasonal specials.
Can start to feel static – The lack of dynamic transitions, scheduling, or dayparting can make your diners tune out the menu board entirely.
To set this up:
- Format your USB drive as FAT32 (Windows: right-click drive > Format > choose FAT32) or exFAT on Mac (Disk Utility > Erase > choose exFAT). FAT32 works universally but limits files to 4GB, while exFAT handles larger files but isn't supported by all TVs
- Create a folder named "MenuBoard" on the drive and save menu images as JPG or PNG at your TV's native resolution (1920×1080 for 1080p, 3840×2160 for 4K)
- Name files with leading numbers: 01_Breakfast.jpg, 02_Lunch.jpg, 03_Dinner.jpg
- For videos, export as MP4 with H.264 encoding
- Plug the USB into the TV, select the USB input, and enable slideshow or loop mode.
HDMI connection: Using what you already have
An HDMI setup makes sense when you already have a computer close to the TV and only need to manage one or two screens. The computer becomes the content source, and the TV mirrors whatever appears on it.
Limitation: The computer cannot be used for other tasks, such as POS or back-office work, while it is running the menu display.
To set this up:
- Connect the HDMI cable from your computer’s output to the TV input.
- Use the TV remote to select that HDMI input.
- On Windows, set Duplicate Display mode under Display Settings; on macOS, check Mirror Displays.
- Match the output resolution to the TV (1920×1080 for Full HD or 3840×2160 for 4K).
- Show your menu through PowerPoint, Keynote, or a web browser in full-screen mode.
- Disable the computer’s sleep mode so the display doesn’t go dark mid-service.

Wireless casting: Only for temporary use
If we’re being honest, wireless casting throught AirPlay or Chromecast is the least recommended option for full-day menu boards, but makes for fantastic demonstrations when you want to show stakeholders how easy digital menus can be to get buy-in for the budget.
Limitation:
- The source device needs to stay in range all day, charged, unlocked, connected to Wi-Fi and can’t be used for anything else.
- Wi-Fi congestion during peak hours causes dropouts and a single notification banner interrupts the display.
You can cast from an iPhone using AirPlay (swipe down → Control Center → Screen Mirroring → select TV) or from an Android device using Chromecast (tap the Cast icon and choose your display).
Smart TV apps
If you have a Smart TV, you can install a slideshow or media-player app that supports looping content on TV.
Step-by-step setup:
- Press the Home button on your TV remote and open the Apps or Content Store section.
- Search for and install a slideshow or media-player app (examples include “Photo Slideshow,” “Media Player,” or “Smart Slideshow”).
- Insert a USB drive containing your menu images or upload them from a linked cloud account if the app supports it.
- Adjust settings for slide duration, transition effects, and loop mode so the menu runs continuously.
- Test the visuals on screen and fine-tune brightness or font size for readability.
Digital signage software: Built for scale and reliability
Now we are venturing into remote management territory with all the amazing capabilities provided by digital menu board software such as Look DS. Professional-grade players with cloud-based content management systems provide the most scalable and operationally efficient solution for growing restaurants, multi-location chains, or any operation that needs 24/7 reliability and outdoor ruggedness in drive-thrus.
It’s also important to mention that most Smart TVs nowadays come with a built-in OS that allows you to easily and directly install your signage app on the screen itself. It’s efficient and eliminates the need for extra hardware, but also limits how much control you have over your screens.
For instance, if you’re using a consumer TV, a professional player can boost its performance by facilitating advanced features like multi-zone layouts and dynamic content integration without risk of crashes or lag. If you need a no-stress plug-and-play solution, we recommend the Look HD-2222 Lite player that comes with the Look firmware pre-installed.
- Professional signage player: $130-400+
- Look DS subscription: $13.5/screen/month (annual)

How to set up your TV with Look digital menu board software
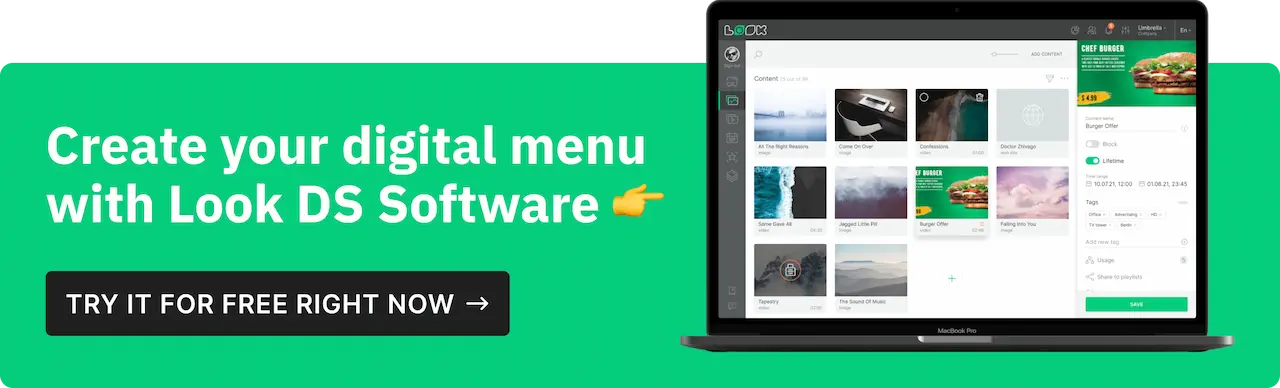
- Connect your digital signage player to the TV using HDMI or install the Look Player directly on the TV if it has a compatible OS, then pair it with the CMS using the six-digit code displayed on the screen.
- Upload your menu images or graphics into Look CMS, or choose a template, and customize it with your branding, fonts, and colors.
- Use multi-zone layouts to show different sections (like specials, drinks, or promos) on the same screen.
- Assign the finished design to a playlist and give it a clear name for easy management.
- Schedule your playlists using dayparting so breakfast, lunch, dinner, or happy hour menus display automatically at the right times.
- For multiple locations, use screen grouping so content updates push to all relevant displays automatically.
- Preview your content on the demo screen, make any final tweaks, then hit publish to go live.
How to Choose the Right Display Hardware
Consumer vs Commercial TV
You can definitely use a consumer TV if you’re managing a single location with basic signage needs and daily operation is under 12 hours. However, the 200-350 nits brightness washes out near windows, the warranty excludes commercial use, 30,000-40,000 hour lifespan means 3-4 year replacement at 16 hours daily, and there’s no kiosk mode to lock settings.
Commercial-grade displays are preferable for long hours (16/7 or 24/7), they have better warranties, reduced burn-in risk, and higher brightness levels, typically 500–700 nits for indoor models and up to 3,000 nits or more for outdoor use, which makes them suitable for various environments.
A screen size guideline:
- Small restaurants/cafés (3-6 foot viewing distance): 32-43 inches
- Medium restaurants/QSRs (6-10 foot distance): 43-55 inches
- Large venues/drive-thrus, food courts, sports bars (10-15 foot distance): 55-75 inches
Whenever you’re unsure, use the 4×6 rule: for every 10 inches of screen diagonal, plan for 4-6 feet of comfortable viewing distance. Measure from the customer ordering position to the wall, instead of the counter edge.
Choose displays with high brightness (at least 350–500 nits indoors; higher near windows) and wide viewing angles for readability across the dining area.

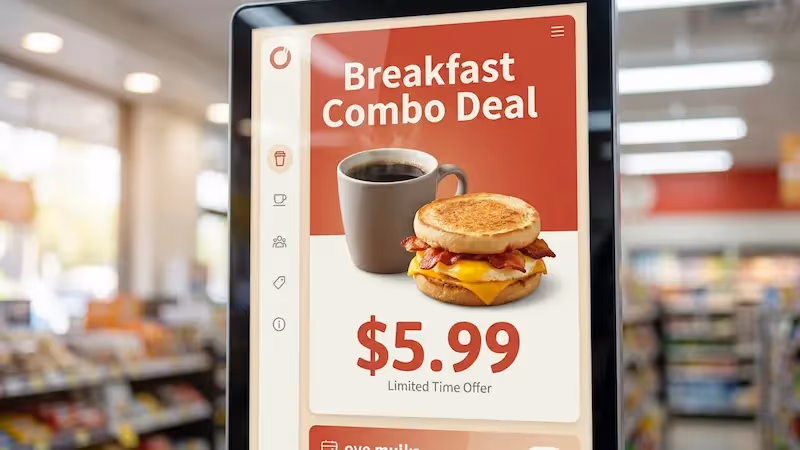
Develop Content: Design standards for readable menus
Despite digital menu boards being the unique selling point most operators are using to stand out from the competition, the truth of the matter is that most of them are done wrong. Upgrading printed menus to digital is simply not enough on its own.
If you want this to be a successful endeavor, one of the most defining questions you need to ask is: How often does the menu need to be updated?
If items, pricing, or promotions change frequently, your design needs to accommodate quick updates without compromising readability. Using Look templates, you can swiftly swap items or update prices efficiently, while keeping the overall design consistent.
Here is a curated checklist of design considerations you need to keep top of mind:
- Use large, legible fonts sized for distance; as a rule of thumb, keep body text at least 28–36 px (or 24 pt) for 1080p screens viewed 8–10 feet away.
- Use high-contrast color combinations (e.g., white/yellow text on dark backgrounds) and avoid cramming too much information on one screen.
- Add icons to quickly convey attributes like spicy, vegetarian, vegan, gluten-free, or contains nuts to aid faster decision-making.
- Highlight specials, limited-time offers, and best-sellers with color accents, borders, or animation to drive attention and upsells.
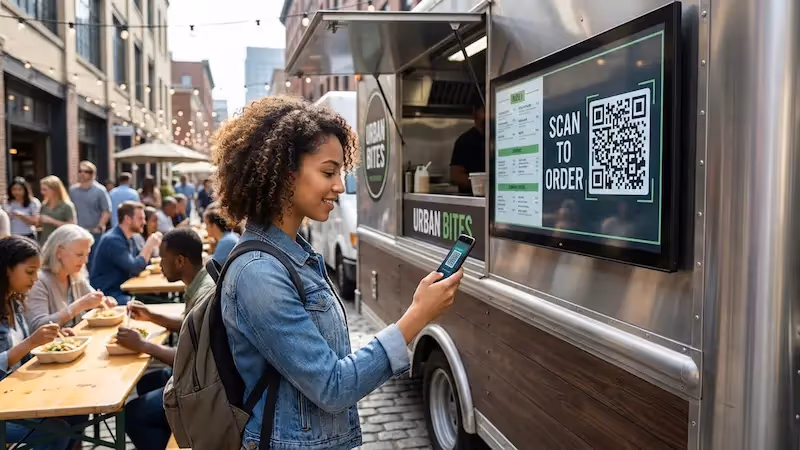
- Include QR codes linking to full menus, nutrition/allergen details, ordering, or promo videos to extend information beyond the TV.
- Plan dayparting: schedule breakfast, lunch, and dinner playlists, plus happy hour and weekends; keep slide durations around 7–12 seconds for readability.
- If local law applies, include calorie counts or nutrition info to maintain compliance with menu labeling regulations.
- To avoid blurry or stretched menus, export content at the TV’s native resolution and set the TV to “Just Scan/Screen Fit” to disable overscan.
- Use descriptive language ("grass-fed beef burger with aged cheddar" instead of "cheeseburger")
Automation Spotlight:
Use Zapier for automatic updates – link your menu board system to Google Sheets and when you update, say, the pricing cell, it pushes the change live on screen automatically. Check our video:
Installation standards
- Counter service displays should be centered 66–72″ high for standing customers, table service 40–50″ for seated viewing, and mounted within 30° of main viewing areas.
- Keep screens away from direct sunlight and bright lights, use anti-glare commercial panels if needed, and tilt 5–10° downward for seated viewers.
- Conceal power and HDMI cables through walls or channels, measure actual routing paths, and keep outlets accessible for resets.
- Prefer wired Ethernet over Wi-Fi, run Cat6 cabling, and test signal strength at each display location.
- Use ultra-narrow bezel panels for video walls, sync content across all screens, and choose portrait for limited menus or landscape for full menus.
Troubleshooting common problems
USB drive not recognized: If a TV doesn’t recognize your USB drive, reformat it (FAT32/exFAT), re-copy files, and test with a smaller set of images or a different USB port.
Blurry or stretched images:
- Verify content resolution matches the TV's native resolution exactly
- Check the aspect ratio is 16:9 for landscape displays
- Disable overscan in TV settings (look for "Just Scan" or "Screen Fit")
- Recreate content at the correct pixel dimensions
Content won't loop:
- Enable repeat/loop setting in the TV media player menu
- Check if the TV requires a specific folder structure for continuous play
- Install a third-party video player app for better looping options
Display goes to sleep:
- Disable all sleep timers in TV power settings
- Turn off screen savers in display settings
- Disable HDMI-CEC (also called Anynet+, Simplink, Bravia Sync)
- Set power cycling schedules if energy savings are needed
Network connectivity drops:
- Switch from Wi-Fi to a wired Ethernet connection
- Move access points closer or add range extenders
- Change DNS settings to 8.8.8.8 (Google) or 1.1.1.1 (Cloudflare)
- Verify network speed: 3-5 Mbps minimum for SD, 10-15 Mbps for HD
Most of these issues can be avoided by using dedicated digital signage software. A cloud-based CMS automates updates, manages screen connectivity, and keeps playback consistent across locations, which helps eliminate manual guesswork and technical glitches common in basic setups. With Look DS, for instance, you get screen snapshots, playback reports, and in-depth analytics to verify content, monitor performance, track errors, and stay on top of alerts remotely.
Meeting FDA calorie labeling requirements
Chains with 20+ locations are required to display calorie information under FDA regulations effective May 7, 2018. Calories go next to item names or prices in font sizes no smaller than whichever is smaller.
The menus must include the succinct statement "2,000 calories a day is used for general nutrition advice, but calorie needs vary" or an approved alternative statement somewhere on the menu board.
This statement helps customers understand calorie information in the context of total daily dietary intake. It’s also required to disclose on the menu board that nutrition information is available on request.
Digital displays make compliance easier since you can update nutritional information instantly when recipes change, unlike printed menus requiring expensive reprinting.
To learn more about menu labeling regulations in the US, read the FDA detailed regulations.
Follow this Implementation Checklist to Stay on Track
Planning phase: Measure installation locations for proper screen sizing, test Wi-Fi strength at display spots, and set realistic budgets including ongoing costs beyond initial hardware.
Setup phase: Choose your method based on actual scale and 2-3 year growth plans, select hardware matching your brightness needs and operating hours, and test software during free trials before committing.
Content development: Hire professional photographers for signature items, design at exact display resolution (1920×1080 or 3840×2160), and test everything on actual displays from customer viewing distances.
Installation and launch: Mount at eye level with concealed cables, configure network settings carefully, and monitor daily during the first week to catch problems before customers notice.
Optimization: Track sales data for featured items, gather staff feedback on customer reactions, and refine layouts based on actual performance before expanding to more locations.
Ready to modernize your menu display? Start your free trial with Look Digital Signage and access restaurant-specific templates, scheduling features, and multi-location management designed for food service operations.