Table of Content
It used to be enough to pick a few high-resolution screens and call it a video wall. Today, those same choices sit at the center of larger decisions about energy use, content clarity, total cost of ownership, and long-term performance.
What’s changed is not only the hardware, but the expectation that your wall will work at scale, stay consistent across environments, and hold up without constant adjustment.
And yet, too many teams still focus on panel size or brand name, without mapping how those choices affect power, calibration, or even replacement timelines. The result is predictable. Projects stall mid-deployment, or worse, look fine on day one and underdeliver every day after.
Understanding Video Wall Panel Technologies
Most video walls today use one of three technologies: LCD, direct-view LED (dvLED), or OLED. Each option has different strengths and is better suited for specific use cases.
LCD panels
LCD panels are commonly used in indoor video walls. Each screen works like a high-end flat-panel monitor with a built-in LED backlight. They are known for sharp resolution and relatively low cost. A single panel might be Full HD or 4K, and when tiled together, they create a high-detail display that works well for content with small text or detailed graphics.
Pros
- Delivers crisp resolution, ideal for data, dashboards, and detailed visuals
- Cost-effective, especially for medium to large walls
- Readily available in standard sizes like 46 or 55 inches
- Familiar mounting and connectivity options
Cons
- Bezel lines remain visible even in ultra-narrow bezel versions
- Less suited for immersive or seamless full-screen visuals
- Limited size flexibility compared to modular systems
- Becomes harder to manage and align as the wall size increases
Direct-view LED (dvLED)
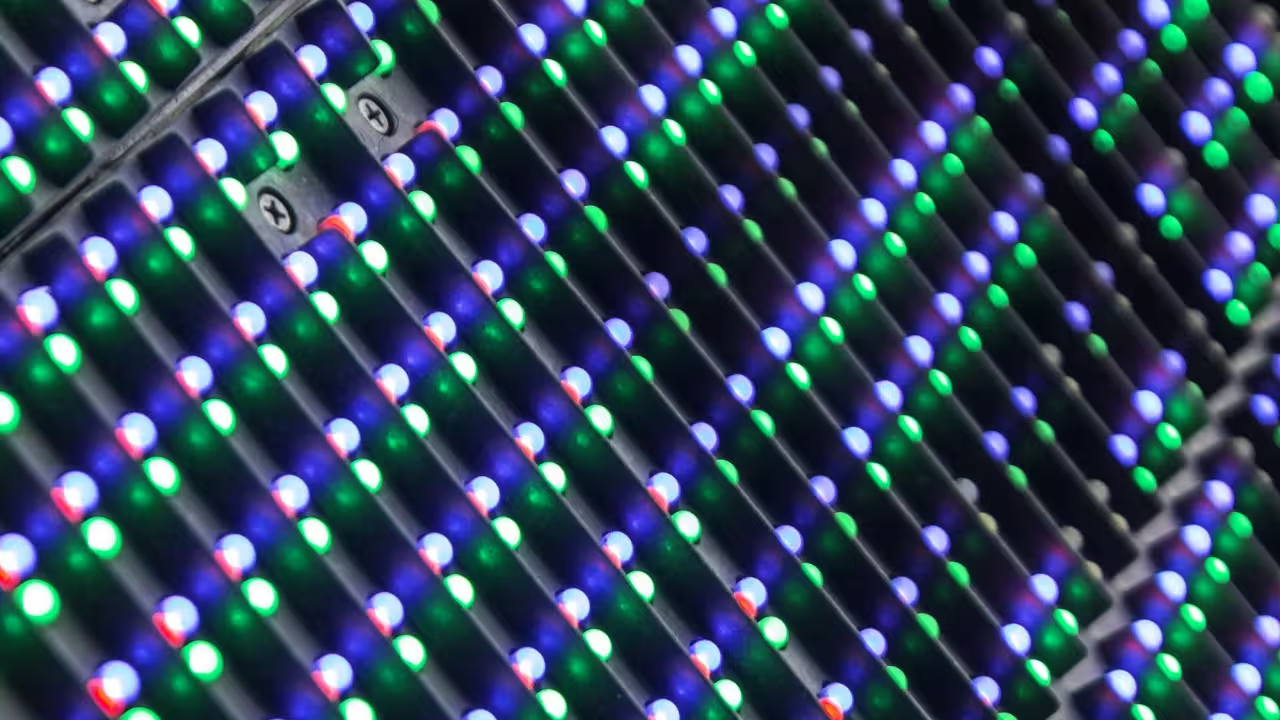
Direct-view LED panels use individual LED lights to form the image. There is no backlight, and there are no bezels. This creates a smooth, uninterrupted canvas that is ideal for large-scale or custom-shaped displays.
Pros
- Seamless display surface with no visible grid lines
- Modular design supports any shape or size, including curves and corners
- High brightness works well in both indoor and outdoor environments
- Long lifespan with less back-end maintenance required
Cons
- Higher upfront investment, especially with fine pixel pitch
- Lower clarity for fine text unless using premium small-pitch panels
- Exposed surface is more delicate during installation
- May require more technical planning for power and control systems
OLED panels
OLED panels are not widely used in commercial video walls, but they are worth mentioning. OLED displays create images using self-lit pixels, which allows them to deliver perfect black levels and very high contrast. They can also be made very thin or even slightly flexible.
Pros
- Excellent contrast and deep blacks for dramatic visual impact
- Ultra-thin and lightweight form factor
- Slightly bendable for creative or artistic layouts
Cons
- Prone to burn-in or image retention with static content
- More expensive than LCD or basic LED setups
- Limited brightness reduces visibility in well-lit areas
- Not ideal for 24/7 use or high-demand signage environments
To learn more, check our video on Everything You Need to Know About Video Wall Digital Signage in the Look Academy
Crucial Factors in Selecting Video Wall Panels
Bezel width
The bezel is the border around each panel. When you place several LCD screens side by side, those bezels form grid lines. Even ultra-thin bezels leave a small visible gap, usually measured in millimeters.
If you want a clean, unified image across the wall, choose panels with the narrowest bezels possible. Top models today offer combined gaps of around 1 to 1.8 millimeters between screens. Some systems, like Barco UniSee, use special mounting frames to create near-seamless alignment.
Brightness levels
In indoor areas with normal lighting, a panel brightness of 500 to 700 nits is usually enough. That includes offices, meeting rooms, and many retail environments. If your wall faces bright lights or windows, consider panels in the 700 to 800 nit range.
For outdoor use or areas with direct sunlight, you’ll need much higher brightness. Outdoor LED walls often run at 3000 to 8000 nits. Even window-facing displays sometimes use 1500 to 2500 nit LCDs to stay visible behind glass. If the display is too dim, viewers won’t see the content clearly during the day.
Related article on the Look Blog: What Are Display Nits and How Many Are Needed Outdoors?
Pixel pitch and resolution
Pixel pitch is the distance between the center of one LED pixel and the next, measured in millimeters. Smaller pixel pitch means higher resolution and smoother images. Larger pitch means fewer pixels and lower detail.
As a rule of thumb, the closest comfortable viewing distance in meters is roughly equal to the pitch in millimeters. So a wall with a 2.5 millimeter pitch will look good from 2.5 meters away. If viewers stand closer than that, they may see the gaps between pixels.
If your audience is standing close to the wall, go with a fine pitch like 1.5 mm or smaller. For walls seen from farther away, like billboards or stage backdrops, a larger pitch, like 4 mm or 6 mm, is more cost-effective and performs just fine.
Best Video Wall Panel Brands for 2025
Here are some of the best video wall brands in 2025, with notes on where each brand tends to stand out.
Samsung
Samsung offers a wide range of video wall products. On the LCD side, their narrow-bezel panels (like the UM and UD series) are widely used in control rooms, retail, and corporate spaces. These panels are known for good color quality, reliable operation, and sharp images.
Samsung also produces high-end LED products, including MicroLED options like "The Wall," aimed at premium installations. These are modular, bright, and support custom layouts. Some models are also available in 21:9 formats for meeting rooms.
LG
LG is a strong competitor in both the LCD and LED segments. Their LCD video wall panels often use IPS technology, which provides better color uniformity and wide viewing angles. For example, their 55-inch VL series has very thin bezels, which helps reduce visible grid lines.
In the LED space, LG’s MAGNIT MicroLED panels offer high resolution with a special coating for improved durability. LG is also one of the few companies exploring formats like transparent OLED, though that remains a niche product.
Like Samsung, LG products are built for 24/7 operation and typically come with multi-year warranties. If you value color accuracy and overall visual quality, LG is worth considering.
Sharp/NEC
Sharp NEC Display Solutions has a long history in mission-critical environments, especially control rooms and government facilities. Their LCD video wall panels (like the UN series) are built for durability and color matching. They also offer direct-view LED solutions bundled with processing tools and software.
NEC panels often include advanced calibration systems to help match all panels perfectly. TAA-compliant models are available for government use in the US. Warranties usually range from three to five years, and support services are well-regarded.
If your wall needs to run 24/7 or display data that must be accurate and consistent, Sharp/NEC is a strong option.
Planar (Leyard)
Planar, now part of the Leyard group, focuses almost entirely on video wall products. Their LCD solutions, like the Clarity Matrix, are designed for professional installations, with easy-alignment mounting systems and off-board electronics for easier maintenance.
Their LED offerings, such as the DirectLight and TVF series, are used in broadcast studios, corporate lobbies, and public displays. Some models come with extended or lifetime warranties, which is rare in this space.
Planar has a strong presence in North America and parts of Europe. If you’re looking for dedicated video wall support and are working on a flagship installation, they’re a good brand to consider.
Absen
Absen is one of the top LED exporters worldwide and is often selected for projects that need scale without breaking the budget. They produce indoor and outdoor LED panels in a range of pixel pitches and are commonly used in rental and staging, as well as retail and education.
In recent years, Absen has focused on making its systems easier to install and service. They’ve also expanded their service center network, which helps with replacements or support. Standard warranties range from two to three years, with options to extend.
Absen is a practical choice if you want a reliable LED wall and need to manage costs. You may not get the same finish or high-end coatings as more expensive brands, but the performance is consistent.

Mounting & Installation Essentials
Mounting systems: fixed and pop-out
There are two main ways to mount a video wall. The first is with a fixed mount, which holds each panel in place against the wall. This option is cost-effective and works well if you don’t expect to service the wall frequently. However, access becomes a problem if you ever need to replace or adjust one of the middle panels.
The second option is a pop-out mount. This is a more flexible design that allows panels to slide or fold outward when pushed, giving you access behind the screen. Pop-out mounts are now common in LCD walls, especially in grids larger than 2 by 2. Most include micro-adjustment points so the installer can fine-tune the height, tilt, and depth of each screen for a clean alignment.
Pop-out systems cost more than fixed mounts, but they make long-term maintenance much easier. They also make the installation process smoother, especially when working with tight bezels that require precise alignment.
Mounting for LED walls
Direct-view LED walls are usually mounted using a modular frame. These frames attach to the wall or floor and hold the LED cabinets in place. Unlike LCD, LED panels connect to each other and rely on the overall frame for structure.
Alignment is even more important for LED walls. Misaligned cabinets can create seams or shadow lines that break up the image. Many LED vendors supply or recommend a matching mounting system. Use that if possible, especially if the wall includes curves or corners.
Access: front vs rear
Before installation begins, decide how you’ll access the wall in the future. If the back of the wall will be blocked, make sure your design includes front-service access. Most LED modules can be removed from the front using a magnetic tool. For LCD, this usually means using pop-out mounts.
If the wall is built into a space with rear access, such as a control room with a maintenance corridor, you can use simpler rear-service mounts. These are often less expensive and allow for easier cable management, but they require room behind the wall for technicians to work.
Structural support
Video walls are heavy. A single 55-inch LCD can weigh 20 to 25 kilograms, and a full wall of them adds up quickly. Mounting systems must be attached to surfaces that can handle the load. For drywall installations, that often means reinforcing the wall or attaching directly to studs or concrete. Free-standing frames or ceiling-mounted rigs should also be reviewed by a professional.
Always check the depth of the setup as well. LCD mounts typically hold the screens 4 to 6 inches off the wall, plus the screen thickness. This may matter if you’re working with limited space or need to meet accessibility requirements.
Cabling and power
A clean installation requires good cable management. Plan where each cable will go before installation starts.
Signal cables vary depending on the type of wall. You might be using HDMI, DisplayPort, or network cables, depending on the controller. Use cable guides or built-in channels in the mounts to keep everything tidy. Label all cables clearly so that replacements or adjustments are easier later.
Controllers and Media Players for Video Walls
Once the panels are in place, you need a reliable way to send content to them, keep everything in sync, and handle different content types throughout the day. That’s where controllers and media players come in.
What is a vide wall controller?
A video wall controller is a system that splits or manages your content across all the screens. It can be a piece of hardware, a software-based system, or a combination of both.
There are several ways to handle this, and the right choice depends on your wall’s size, layout, and what kind of content you want to show.
- Hardware Video Wall Processor
These are dedicated physical devices that split, scale, and route video signals to multiple screens, often used in high-end or mission-critical setups. They're powerful and reliable, but can be pricey and usually require expert configuration.
- Software + Multi-Output PC
This setup uses a strong PC with multiple display ports and special software to manage the video wall as one large screen. It’s flexible and more affordable for moderate setups, but it needs a capable GPU and good system design to stay smooth and stable.
- Daisy-Chaining and Built-in Solutions
Some LCD panels let you connect screens in a chain and handle the image splitting internally, without a separate controller. It’s great for basic 2×2 layouts or tight budgets, though it limits layout options and screen count.
Media players
The digital signage player is the device that stores and plays your content. For a video wall, the media player must be powerful enough to support the total resolution of the display. For example, if your wall has a 4K resolution across all panels, your media player must be able to output a clean 4K signal without lag.
In simple setups, one media player can drive the entire wall through a controller or daisy chain. In more complex layouts, you might use multiple players — one per panel or one per zone. If you do this, make sure your CMS software supports syncing across devices.
The Look DS software is designed to be hardware-agnostic and can work with various controllers and players. For example, you could run the Look player app on a Windows PC that’s acting as your video wall controller – then that PC drives the whole wall, and Look takes care of content management on it.
💡 Check out the Look Digital Signage Hardware Guide, which covers in detail how to choose players and screens for different needs – a useful reference when planning the controller/player part of your project.
Essential Accessories and Add-ons
There are several smaller components that help your setup run smoothly and stay reliable over time. Some of these accessories are essential from day one. Others are good to have on hand for future service, repairs, or upgrades.
Video wall processors and scalers
If your controller can’t handle custom layouts or multiple sources, a processor can step in. It helps scale, crop, or reformat the signal so it matches your wall’s layout, especially useful when mixing content types or screen sizes.
Signal extension and conversion
Signals weaken over long distances. If your player isn’t near the wall, you’ll need extenders that send video over CAT6, CAT7, or fiber. HDBaseT is a common option for this.
Converters come in when connection types don’t match, like SDI to HDMI, and are common in server rooms and large spaces.
Redundancy options
If the wall is mission-critical, a few add-ons can keep things running during a failure:
- Backup power supplies for LED panels
- UPS systems for short outages or safe shutdowns
- Pre-configured backup players
- Failover switches that auto-swap video feeds if one goes down
And when you're in the setup stage, this step-by-step guide to setting up a video wall covers everything from hardware placement to player configuration.
Maintenance and Troubleshooting of Video Wall Panels
Calibration and brightness balance
Video wall calibration helps maintain uniformity over time. It involves adjusting the brightness and color balance across all panels so that the wall still looks uniform. Some systems have built-in tools for this, especially high-end models. Others may require a technician to use external sensors or calibration files.
Cleaning and physical care
Panels gather dust, especially in public or high-traffic spaces. A layer of dust can reduce brightness or trap heat. Plan to clean the screens regularly using a microfiber cloth and a mild cleaner.
For LCD panels, avoid strong chemicals or excess moisture. For LED panels, be extra careful. The front surface can be delicate unless it’s a protected COB module or has a coating. Use compressed air or a soft brush to remove dust without touching the pixels directly.
Also, check that ventilation paths are clear. If your panels have fans or vents, they need open space to function properly. Blocked airflow can lead to overheating or automatic shutdowns.
Monitoring system health
Many LED controllers and professional video wall systems include monitoring tools. These can track issues like temperature spikes, fan failures, or dropped signals. Some can send alerts when something goes wrong.
Here are a few of the most common problems and what usually causes them.
A panel is off or black:
Start by checking the power and signal cables. If the cables are secure and the screen still doesn’t turn on, try swapping in a known working input source. For LED panels, check if the module is getting data from the controller.
Color mismatch:
This can happen if a panel’s settings were changed or if a new module hasn’t been calibrated to match the others. Use your wall’s calibration tools to adjust the affected area.
Content looks pixelated or blurry:
This could be a resolution mismatch. Make sure your media player is outputting the right resolution for the wall. Сheck if the content itself is high enough quality to stretch across the full wall without losing detail.
Image retention or burn-in:
LCD panels can show faint outlines of static content if it’s left on the screen too long. This usually fades over time. Pixel shifting or screen savers can help reduce the risk. OLED panels are more sensitive to burn-in, so avoid using them for static menus or dashboards.
Integrating Video Wall Panels with Look Digital Signage
Look Digital Signage lets you upload media, sync content across multiple screens, and manage even complex layouts through a simple cloud-based dashboard. The platform supports high-resolution output, dynamic triggers, and smart scheduling across single or multi-site setups.
You can explore more of Look’s digital signage features to see how it works behind the scenes.
Ready to take control of your video wall content? Start your free trial today.


